FAQ
Frequently asked questions and answers.
Please check that the battery jumper is attached to the CPU block. Remove the jumper only when two batteries are connected.
- 1 battery connected → Attach jumper
- 2 batteries connected → Remove jumper
Please reinstall the USB driver.
- Connect the USB downloader to the CPU and run the PROBO HEX program.
- When the program starts, swipe down and select DRIVER DOWNLOAD.
- Click "Install black USB driver". ※ If you have a white USB driver, it is an old model — please trade it in for a new one.
- Click the INSTALL button.
- Installation completes shortly. (Driver install success!)
- If connection still fails after install, UNINSTALL and INSTALL again.
⚠ Since Connect is an after-school class kit, the USB downloader is not included in the product.
※ Individual users need to purchase it separately.
- Make sure the remote's batteries are inserted with correct +/- polarity.
- Make sure the remote is properly paired with the robot. If pairing is incorrect, the LED blinks slowly.
How to pair via RF
- First-time pairing — Turn on the RF remote and CPU block, then press the pairing switches on the RF remote and RF receiver board. The LEDs blink quickly while searching for each other's signal.
- Pairing complete — When the LEDs on the RF remote and RF receiver board stop blinking and stay on, pairing is complete. When you press a button on the RF remote, check that the blue receive LED on the RF receiver board lights up.
- Previously paired robots reconnect automatically — Once paired, the robot automatically finds and connects to the registered remote signal when you turn the power off and on again.
Pay attention to the angle of the yellow groove when assembling. If the angle is off, the robot will not move properly.
Motor Groove Direction
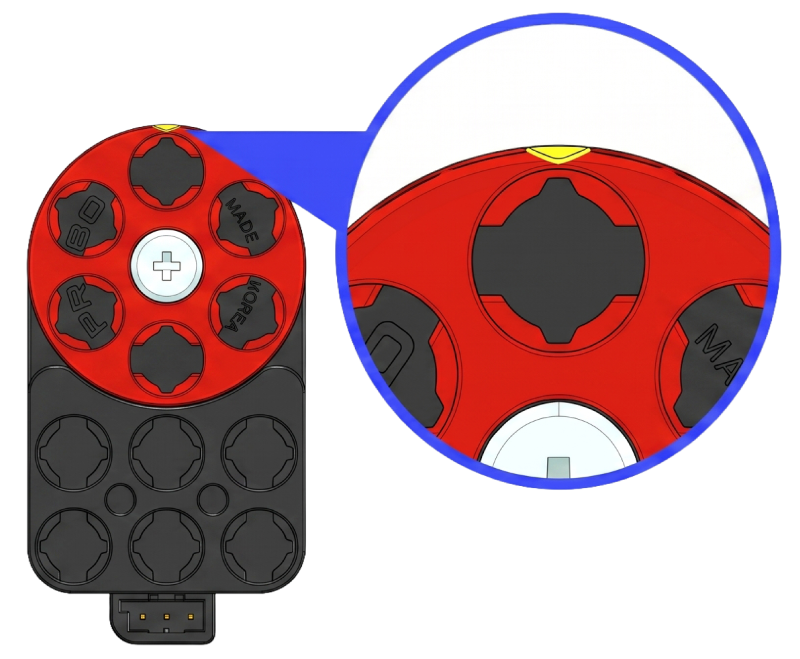
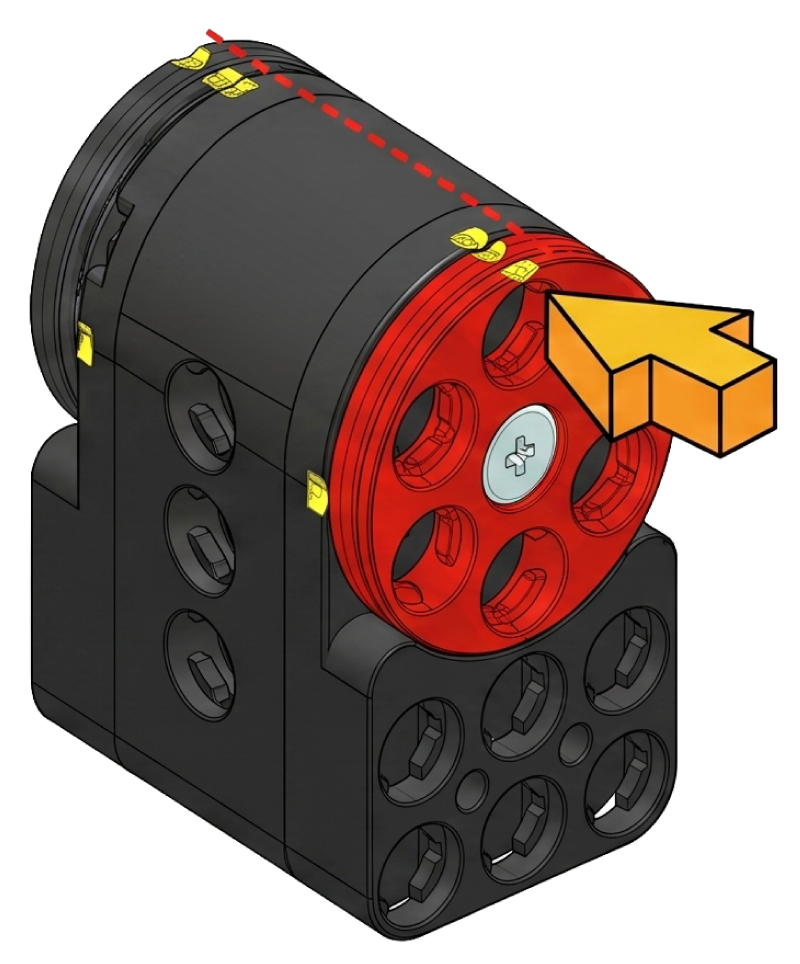
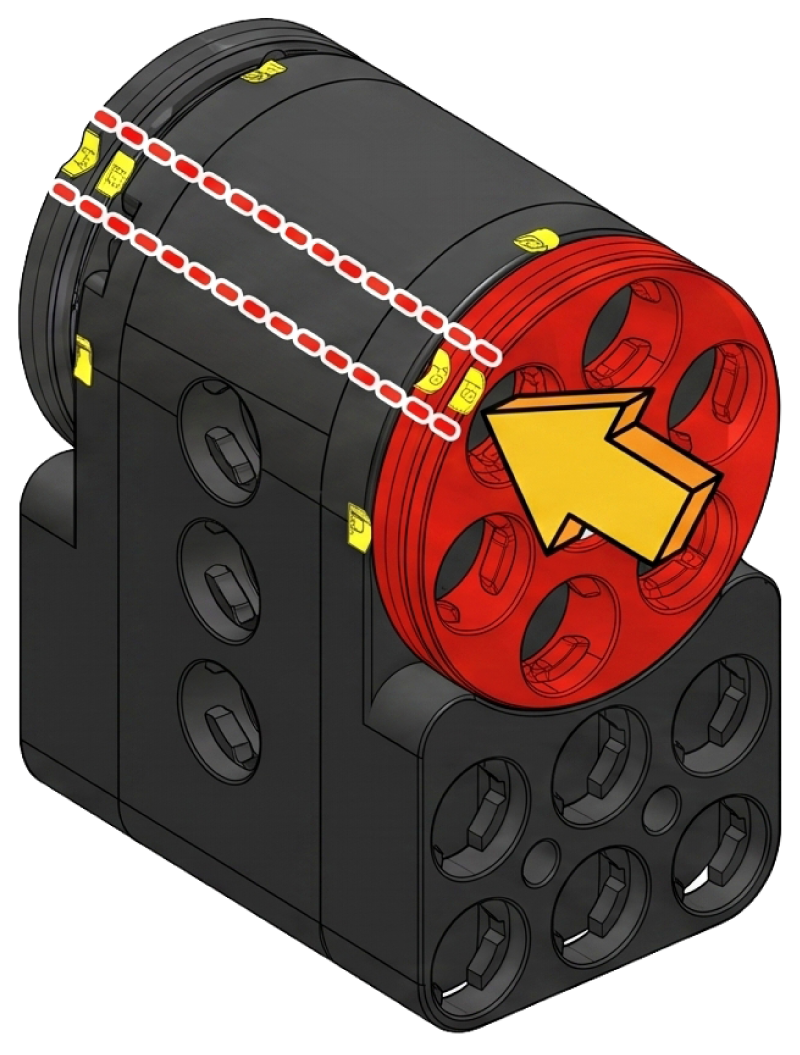
- Check the angle of the yellow groove area.
- If the groove direction is wrong, detach the motor and reassemble.
Frame Groove Direction
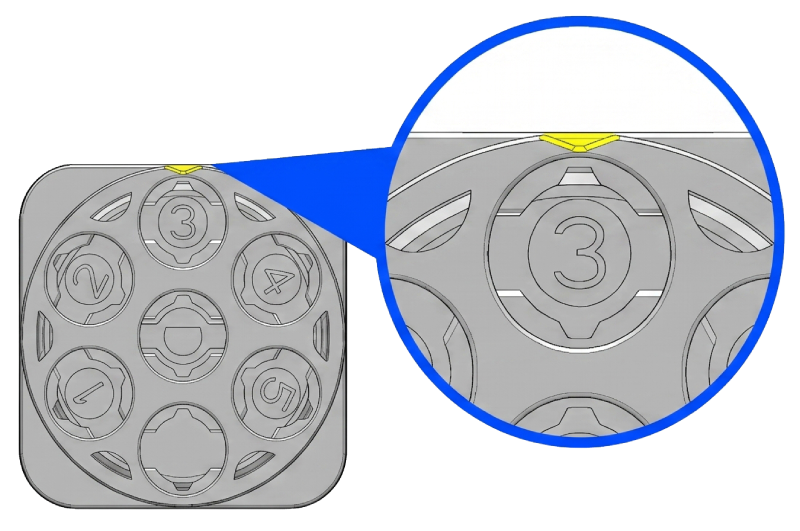
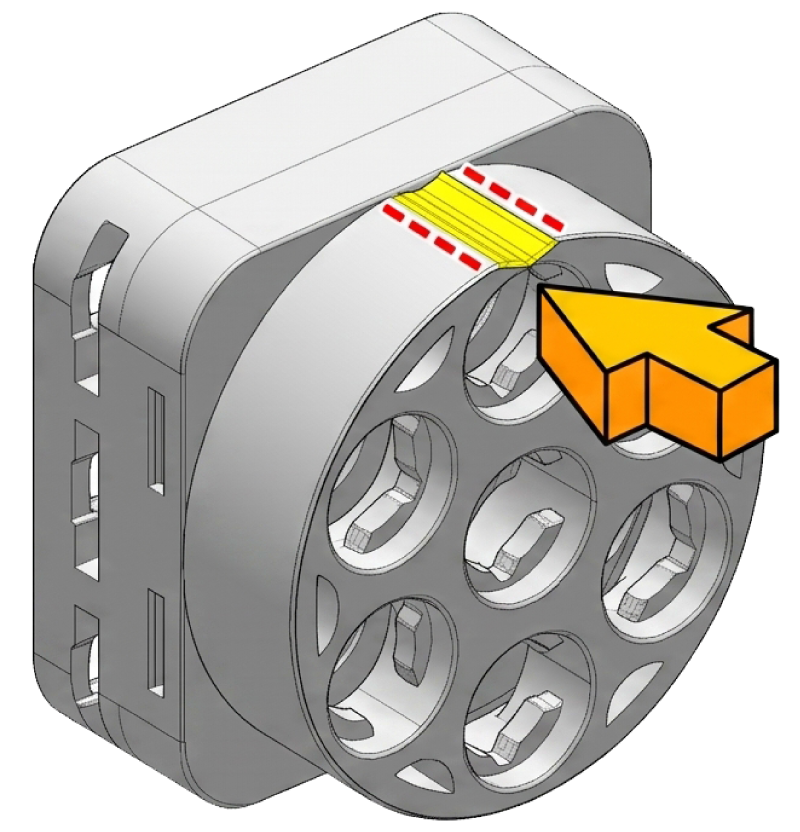
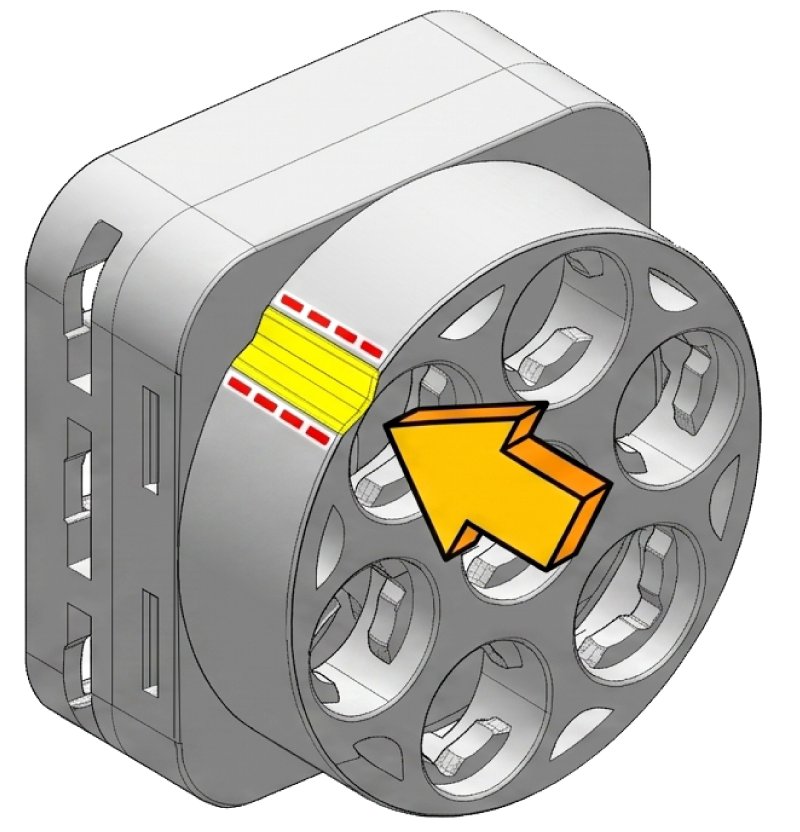
- Check the angle of the yellow groove area.
- If the frame groove direction is wrong, detach and reassemble.
- Remove the batteries from the battery block when the robot is not in use.
- Use alkaline batteries instead of manganese batteries.
- Do not mix used and new batteries.
- Supports the ALUX coding app (block coding) and Scratch 3.0. For text coding, refer to the separate guide.
- Connect works on Windows and Android. (Apple products and other OSes are not supported.)
As an educational robot kit, Connect provides appropriate precision. Refer to each part's spec sheet for gear backlash and sensor tolerance.