RF Pairing
How to wirelessly connect the RF remote and the robot.
Good to Know
- Pairing
- Registering the RF remote and RF receiver board so they can exchange signals
- RF Remote
- A remote that transmits signals via frequency like TV or radio, not infrared
Preparation
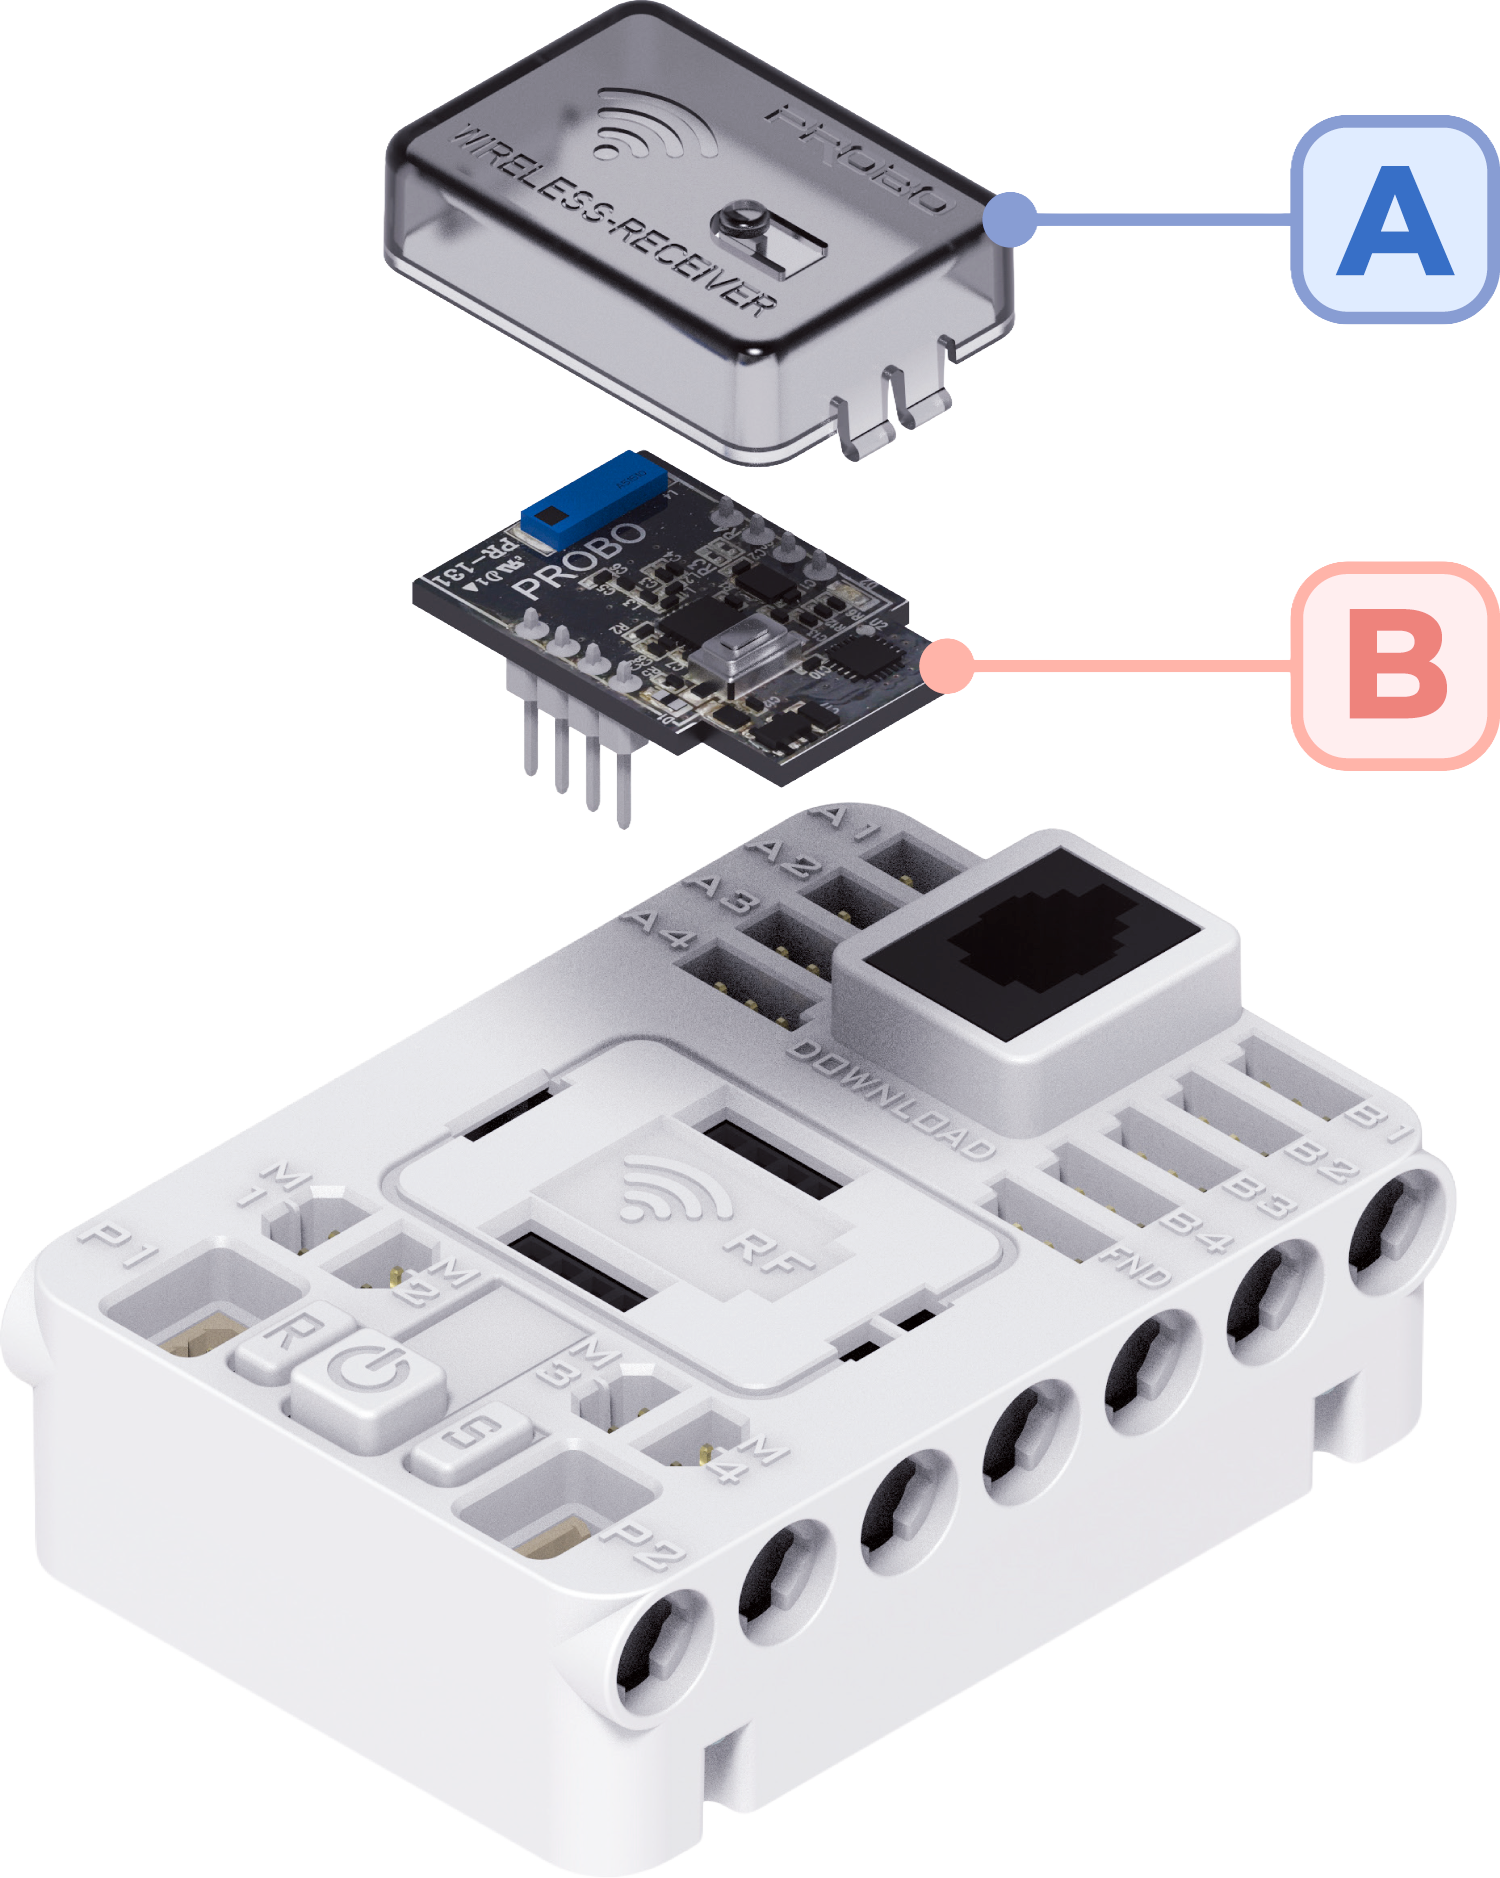
RF Receiver Board
How to Install Receiver Board
Once the RF receiver board that receives signals from the remote is installed on the CPU block, it doesn't need to be disassembled.
ATop: RF Receiver Cover
BBottom: RF Receiver Board (PCB)
1
RF Remote
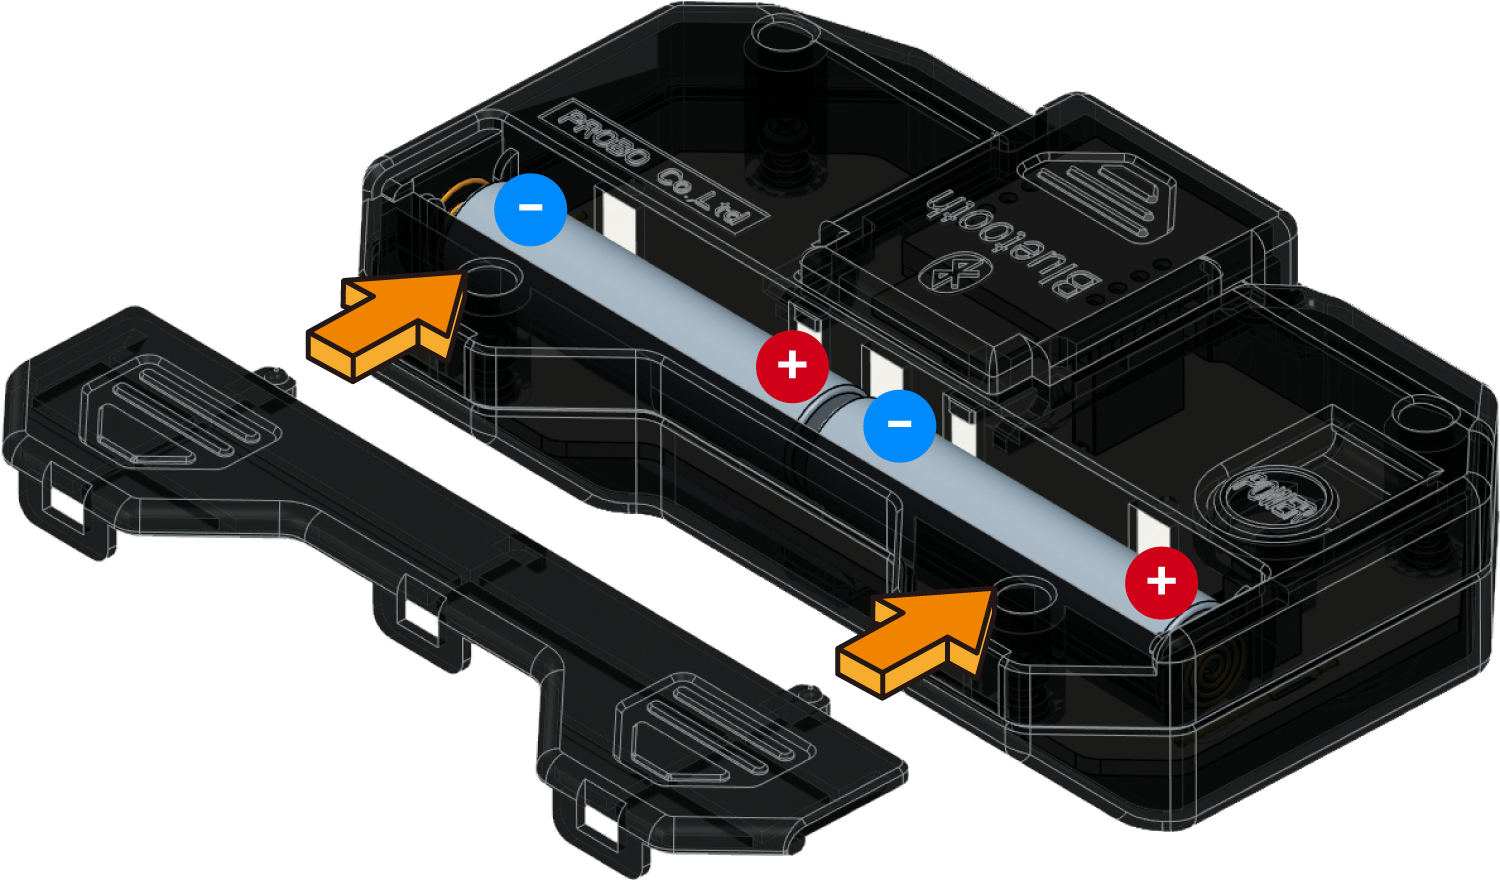
Replace Batteries
Slide off the back cover and insert two batteries.
Note: Check +/- polarity.
2
RF Remote
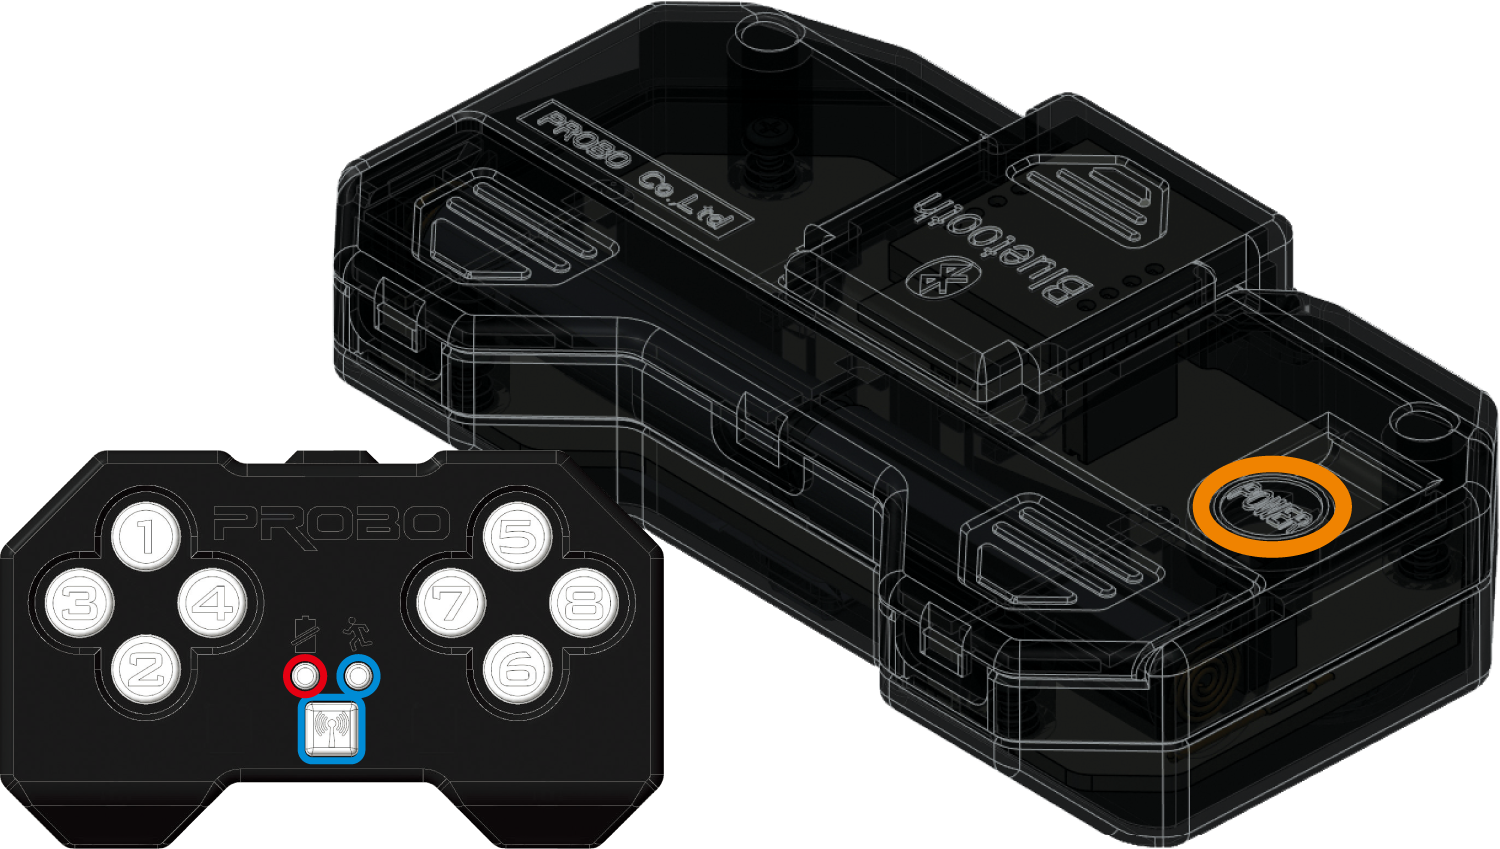
Turn On Power
After inserting batteries, press the power switch on the back once — the front LED blinks and the remote turns on.
Pairing Method
01
Pairing for the First Time
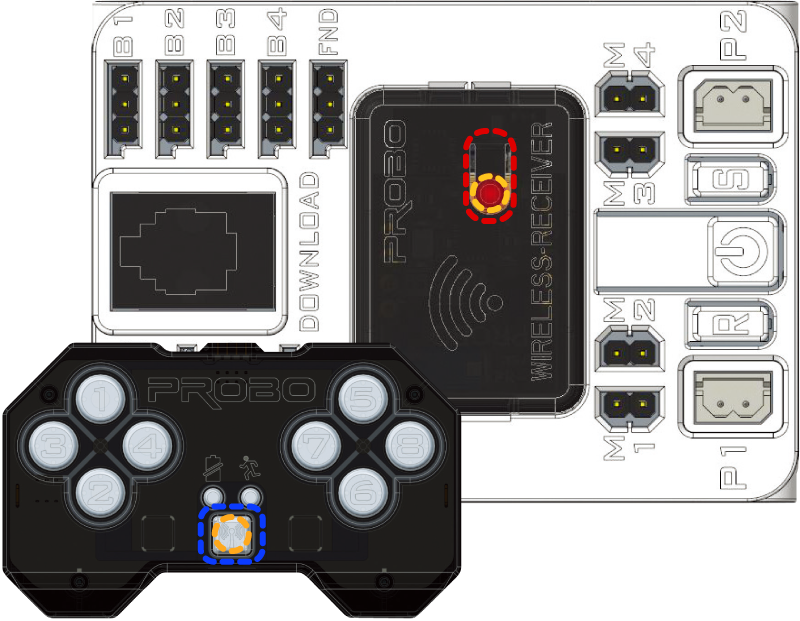
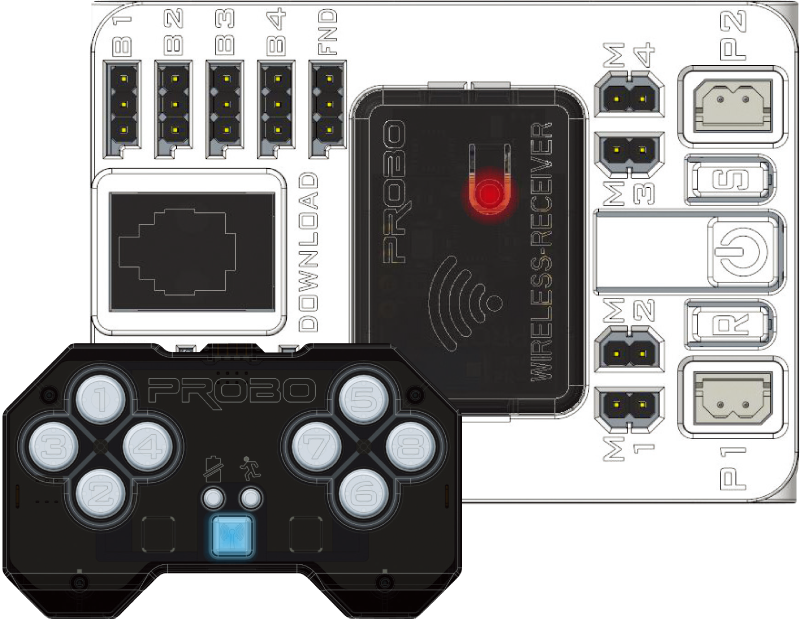
After turning on both RF remote and CPU block, press the pairing switches on the RF remote and RF receiver board. The LEDs blink quickly while searching for each other's signal.
CPU block: Press the pairing switch on the RF receiver board
Remote: Press the pairing switch
Both LEDs blink rapidly
02
Pairing Complete
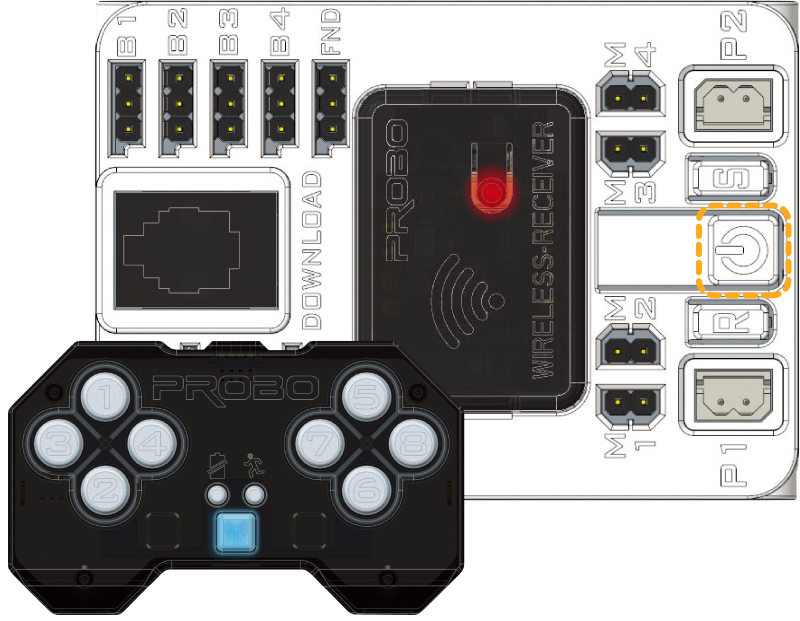
When the LEDs on the RF remote and RF receiver board stop blinking and stay on, pairing is complete.
How to verify: When you press a button on the RF remote, check that the blue receive LED on the RF receiver board lights up.
03
Reconnect with Previously Paired Robot
Once paired, the robot automatically reconnects: the RF receiver board LED blinks slowly and finds the previously registered remote signal.
Auto-connect: Just turn on the power — no re-pairing needed.